Kenmore Dishwasher Model 665 Repair Manual: A Comprehensive Guide
This manual provides detailed instructions for repairing your Kenmore 665 dishwasher, covering common issues and offering solutions for both novice and experienced repairers;
Understanding the Kenmore 665 Dishwasher
The Kenmore 665 dishwasher, manufactured by Whirlpool, is a popular model known for its reliability and efficient cleaning performance. Understanding its core components is crucial for successful repairs. This dishwasher utilizes a standard cycle sequence: filling with water, washing with detergent, rinsing, and draining. Key parts include the water inlet valve, circulation pump, drain pump, heating element, and control board.
The control board orchestrates all functions, receiving input from sensors and activating the appropriate components. The circulation pump distributes water through spray arms, while the drain pump removes wastewater. A faulty heating element can result in lukewarm water and poor drying. Identifying the specific parts needed, like a dishwasher door seal or lower dish rack roller, is the first step towards effective troubleshooting. Knowing your Kenmore model number (e.g., 665.12772K310) is vital when sourcing replacement parts.

Locating a Repair Manual
Finding a comprehensive repair manual for your Kenmore 665 dishwasher is essential for tackling repairs effectively. While a dedicated Kenmore manual might be challenging to locate directly, Whirlpool’s documentation often covers this model due to their manufacturing partnership. Online resources like ManualsLib and RepairClinic offer downloadable manuals, often available for free or a small fee.
Searching using the full model number (e.g., 665.12772K310) will yield the most accurate results. Alternatively, appliance parts retailers frequently provide schematic diagrams and troubleshooting guides. These resources detail component locations and offer step-by-step instructions. Remember to prioritize safety and disconnect power before attempting any repairs. Accessing these manuals empowers you to confidently address issues, potentially saving on professional service costs and ensuring your Kenmore dishwasher remains operational.
Common Problems & Troubleshooting
The Kenmore 665 dishwasher, like all appliances, can experience common issues. Frequently reported problems include failure to start, poor cleaning performance, and water leaks. A dishwasher not starting often stems from a faulty door latch, control board malfunction, or thermal fuse issue. Poor cleaning can be caused by clogged spray arms, a failing circulation pump, or insufficient detergent.
Leaks typically originate from the door seal, drain hose connections, or a cracked tub. Troubleshooting involves visually inspecting components, testing electrical continuity with a multimeter, and verifying proper water pressure. Before disassembling, consult a repair manual for specific diagnostic steps. Addressing these issues promptly prevents further damage and restores optimal dishwasher functionality, ensuring sparkling clean dishes every time.
Dishwasher Not Starting
If your Kenmore 665 dishwasher fails to start, several potential causes need investigation. First, verify the power supply – check the circuit breaker and ensure the dishwasher is properly plugged in. A faulty door latch is a common culprit; if the latch doesn’t fully engage, the dishwasher won’t initiate a cycle. Inspect the thermal fuse, which protects against overheating; a blown fuse prevents operation.
The control board could also be malfunctioning, requiring testing or replacement. Use a multimeter to check for continuity in key components. Sometimes, a simple reset by unplugging the dishwasher for a few minutes can resolve minor electrical glitches. Always prioritize safety by disconnecting power before any internal inspection or repair attempts.
Poor Cleaning Performance
Experiencing unsatisfactory cleaning results with your Kenmore 665 dishwasher? Several factors could be at play. Begin by checking the spray arms for clogs – food particles can obstruct water flow, reducing cleaning effectiveness. Ensure proper detergent usage; using too little or the wrong type impacts performance. Verify the water temperature reaches at least 120°F for optimal cleaning.
A failing circulation pump can also contribute to poor cleaning, as it’s responsible for distributing water throughout the dishwasher. Inspect the filter for debris and clean it regularly. Finally, overloaded dish racks prevent proper water circulation. Distribute dishes evenly, ensuring spray arms aren’t blocked, to maximize cleaning power.
Leaking Issues
Discovering a leak from your Kenmore 665 dishwasher can cause water damage, demanding prompt attention. A common culprit is a deteriorated door seal; inspect it for cracks or damage and replace if necessary. Check the water inlet valve and drain hose connections for looseness or wear, tightening or replacing them as needed. Inspect the spray arms and their connections for cracks or breaks.
Overfilling can also cause leaks, potentially stemming from a faulty water inlet valve or a malfunctioning float switch. Carefully examine the area around the pump and motor for signs of leakage. Addressing these issues promptly prevents further damage and ensures efficient dishwasher operation. Always disconnect power before inspecting internal components.
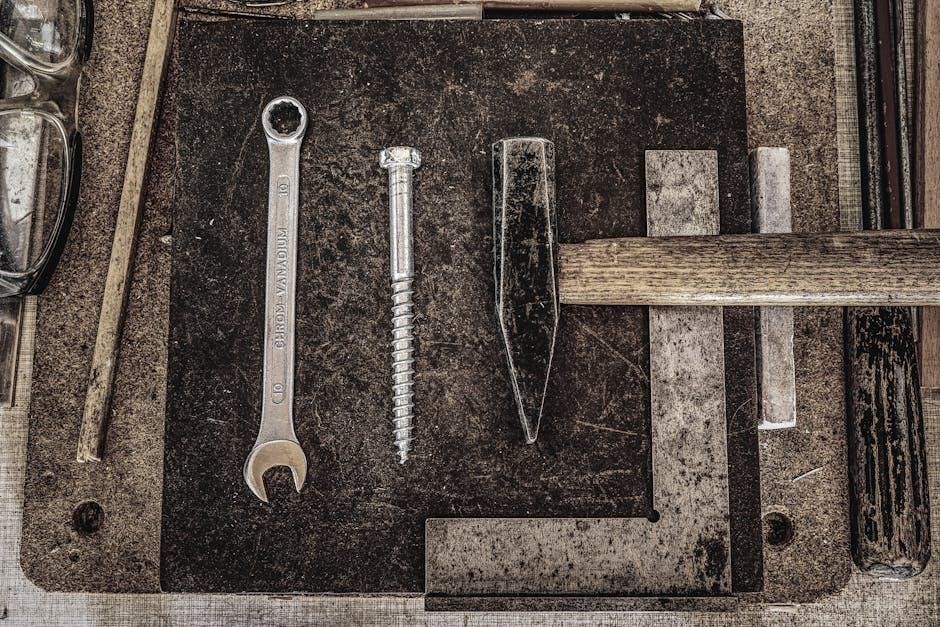
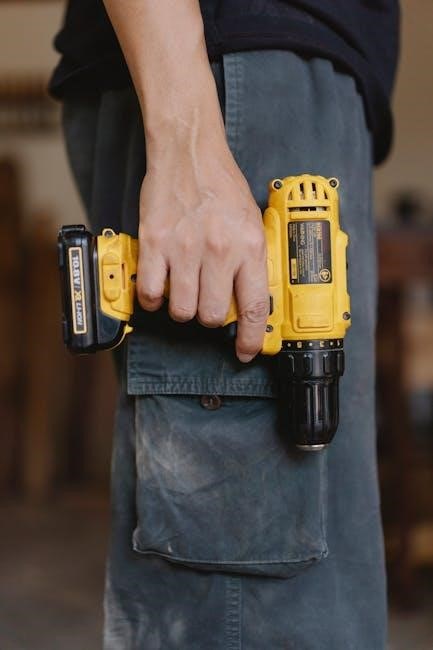
Essential Tools for Repair
Successfully tackling repairs on your Kenmore 665 dishwasher requires a specific toolkit. A Phillips head screwdriver is crucial for accessing internal components, alongside a flathead screwdriver for various adjustments. Pliers, including needle-nose, assist with gripping and manipulating small parts. A socket set is essential for removing bolts and fasteners.
A multimeter is vital for testing electrical components like the heating element and control board. Don’t forget adjustable wrenches for plumbing connections and a rubber mallet for gently dislodging stuck parts. Safety gear, including work gloves and safety glasses, is paramount. Having these tools readily available streamlines the repair process and ensures a safe, efficient outcome.
Replacing the Door Seal
A damaged door seal on your Kenmore 665 leads to leaks. Begin by disconnecting power to the dishwasher. Carefully remove the old seal, noting its orientation – often it’s held in place by a groove. Thoroughly clean the door’s sealing surface to ensure a proper fit for the new seal.
Align the new door seal into the groove, pressing firmly to secure it along the entire perimeter. Ensure a tight, even seal. Reconnect the power and test for leaks by running a short wash cycle. If leaks persist, double-check the seal’s installation and ensure it’s fully seated. A properly installed seal prevents water damage and maintains dishwasher efficiency.
Repairing the Lower Dishrack Roller
If your Kenmore 665’s lower dish rack is difficult to slide, a faulty roller is likely the culprit. First, remove the dish rack from the dishwasher. Inspect each roller for damage – cracks, breaks, or excessive wear. To replace a roller, gently pry it out of its socket; a flathead screwdriver can assist.
Insert the new roller, ensuring it clicks securely into place. If the socket is damaged, it may require replacement as well. Reinstall the dish rack and test its movement. Smooth gliding indicates a successful repair; Replacing worn rollers restores easy loading and unloading, preventing further damage to the rack or dishwasher interior.
Adjuster Kit Replacement
An adjuster kit controls the upper rack’s height within your Kenmore 665 dishwasher. If the upper rack slips or doesn’t stay level, the adjuster kit likely needs replacing. Begin by removing the upper dish rack. Locate the adjuster mechanisms on either side of the dishwasher’s interior. Detach the old adjuster kit components – typically plastic slides or gears – noting their orientation for correct reassembly.

Install the new adjuster kit, ensuring proper alignment and secure attachment. Reinsert the upper rack and test its height adjustment. It should move smoothly and lock firmly into place at various levels. A functioning adjuster kit ensures optimal space utilization and proper water spray coverage for thorough cleaning.

Diagnosing and Fixing Drainage Problems
Persistent water in your Kenmore 665 dishwasher often indicates a drainage issue. Begin by checking for obvious obstructions. A clogged drain hose is a frequent culprit; disconnect it and flush with water to remove debris. Next, inspect the drain pump for blockages – food particles or broken glass can impede its function. Accessing the pump usually requires removing the lower access panel.
If the pump seems clear, test its operation using a multimeter to confirm it’s receiving power during the drain cycle. A faulty pump requires replacement. Ensure the air gap (if present) isn’t blocked. Finally, verify the drain hose isn’t kinked or improperly positioned. Proper drainage is crucial for clean dishes and preventing water damage.
Clogged Drain Hose
A clogged drain hose is a common cause of drainage issues in the Kenmore 665 dishwasher. Food particles, grease, and small objects accumulate over time, restricting water flow. Begin by disconnecting the hose from both the dishwasher and the garbage disposal or sink drain. Inspect the hose visually for any visible obstructions.
Next, carefully flush the hose with warm water, using a garden hose or utility sink. A flexible brush can help dislodge stubborn debris. Check the connection points to the dishwasher and drain for buildup. Ensure the hose isn’t kinked or crushed, as this restricts flow. Reconnect securely, verifying a tight fit to prevent leaks. Regular inspection and cleaning prevent future clogs.
Faulty Drain Pump
If the drain hose is clear, a faulty drain pump is the next likely culprit. The drain pump is responsible for expelling wastewater from the dishwasher. Signs of a failing pump include a humming sound during the drain cycle, or the dishwasher failing to drain completely. First, disconnect power to the dishwasher. Locate the drain pump – typically at the base of the unit.
Test the pump using a multimeter to check for continuity. If there’s no continuity, the pump needs replacing. Remove the old pump, noting the wiring configuration. Install the new pump, ensuring secure connections. Reconnect power and run a drain cycle to verify proper operation. A failing pump often indicates accumulated debris; inspect the pump housing for obstructions before replacement.

Addressing Water Inlet Valve Issues
Insufficient water entering the dishwasher often points to a problem with the water inlet valve. This valve controls the flow of water into the machine. Symptoms include a dishwasher that doesn’t fill properly, or fills very slowly. Begin by disconnecting power. Locate the water inlet valve – usually found behind the lower access panel.
Test the valve with a multimeter for continuity. If it lacks continuity, replacement is necessary. Before replacing, check the screen filter on the inlet for sediment buildup. Remove the old valve, carefully noting wire connections. Install the new valve, ensuring a tight seal to prevent leaks. Reconnect the water supply and power, then run a cycle to confirm proper water intake.
Testing the Heating Element
A malfunctioning heating element prevents the dishwasher from adequately heating water, resulting in poor cleaning performance. Safety first: disconnect power before any testing. Locate the heating element – typically at the bottom of the dishwasher tub. Use a multimeter set to the ohms setting to test for continuity across the element’s terminals.
A reading of zero or very low ohms indicates a good element. Infinite resistance signifies a burned-out element requiring replacement. Accessing the element often involves removing the lower spray arm and potentially some internal components. Carefully disconnect the wires and remove the old element. Install the new element, ensuring secure connections, and reassemble the dishwasher. Restore power and run a cycle to verify proper heating.
Replacing the Circulation Pump
The circulation pump is vital for distributing water throughout the dishwasher during cycles. A failing pump results in inadequate water circulation and poor cleaning. Begin by disconnecting power to the dishwasher. Locate the circulation pump – usually accessible from the bottom of the unit. Disconnect the hoses connected to the pump, noting their positions for reassembly.
Remove the mounting screws securing the pump and carefully lift it out. Before installing the new pump, inspect the impeller for debris and clean if necessary. Connect the hoses, ensuring a tight seal, and secure the pump with the mounting screws. Restore power and run a test cycle to confirm proper water circulation and operation.
Understanding the Control Board
The control board acts as the dishwasher’s brain, managing all functions from water intake to cycle timing. Diagnosing control board issues requires caution, as incorrect troubleshooting can cause further damage. Visually inspect the board for burnt components or swollen capacitors – signs of failure. Use a multimeter to test for continuity and voltage at designated test points, referencing the wiring diagram.
Before replacing the control board, ensure all other components are functioning correctly. A faulty control board often stems from power surges or water damage. Replacement involves disconnecting the wiring harness, carefully removing the old board, and installing the new one. Always double-check connections before restoring power.
Safety Precautions During Repair
Prioritize safety when repairing your Kenmore 665 dishwasher. Always disconnect the power at the circuit breaker before beginning any work to avoid electrical shock. Turn off the water supply to prevent flooding. Wear safety glasses to protect your eyes from debris and gloves to shield your hands.
Be cautious when handling sharp objects like broken glass or metal components. Never work on a dishwasher that is plugged in or has water present. Properly dispose of old parts and materials. If you are uncomfortable with any aspect of the repair, consult a qualified appliance technician. Remember, safety is paramount to a successful and injury-free repair process.
Where to Source Replacement Parts
Finding replacement parts for your Kenmore 665 dishwasher can be straightforward. Kenmore-specific parts are often available through Sears PartsDirect or other appliance parts retailers specializing in Kenmore appliances. However, many components are universal dishwasher parts, compatible with various brands and models, expanding your sourcing options.
Online retailers like Amazon, eBay, and dedicated appliance parts websites offer a wide selection. Local appliance repair shops may also stock common parts. When ordering, verify the part number (e.g., 665.12772K310) for accurate fitment. Consider both new and refurbished parts to balance cost and reliability. Always check return policies before purchasing.
Kenmore Specific Parts
Sourcing Kenmore-specific parts for your Model 665 dishwasher often begins with Sears PartsDirect, as Kenmore is a Sears brand. This ensures compatibility and accurate fit. Genuine Kenmore parts, while potentially more expensive, guarantee quality and are designed specifically for your appliance. Common Kenmore-specific components include the dishwasher door seal, often listed with the full model number (665.12772K310), and specialized control panel components.
However, be aware that some Kenmore parts are manufactured by other companies. Checking part numbers is crucial, as a part may be branded Kenmore but produced by Whirlpool or another manufacturer. Explore online appliance parts retailers that specialize in Kenmore, comparing prices and availability before making a purchase.
Universal Dishwasher Parts
Many dishwasher components are considered “universal” and can be used across various brands, including your Kenmore 665 model. These typically include items like drain hoses, water inlet valves, and heating elements. Utilizing universal parts can be a cost-effective solution, offering comparable quality at a lower price point than Kenmore-specific alternatives.
When selecting universal parts, carefully verify specifications – voltage, wattage, and physical dimensions – to ensure compatibility. Retailers often provide compatibility charts or search tools. Commonly sourced universal parts include spray arms, rack rollers, and detergent dispensers. Always double-check customer reviews and return policies before purchasing to guarantee a proper fit and functionality for your Kenmore dishwasher.